I can't believe I'm finally showing you my pink bathroom! It still baffles me that I designed all of this. Who knew I could apply my love for colour, prints and fashion styling and put it into a home. This is the first of many renovation blog posts and it's kicked off well with my bathroom reveal. Below you can see a before and after - I know! It's way more inviting and warm now. Keep scrolling and you'll be able to read about what this bathroom went through to look so gorgeous.
[This blog post features gifted & discounted items]


Let's go back to the start. As you can see the bathroom is already pink, but not really how I liked. The floors were dark, the bathroom suite didn't match and it just hadn't really been looked after. Step 1 was to rip everything out.
Once everything was ripped out by our plumber, we had the electricians round to out in all the wiring for our wall lights, ceiling light & extractor fan. Luckily we were putting the new bathroom suite in exactly the same position as before so no piping had to be moved.
It all looked pretty scary at this point. Exciting, but scary, as trying to picture my dream bathroom was hard seeing it in this state.
The next step was tiling. Now deciding tiles was easy as I already knew from the get go I wanted a pink bathroom. There's quite a big variety of pink tiles out there, but I fell in love with the Matrix Azalea style from Topps Tiles. I loved the fact they were square and a peachy pastel pink shade. Now Topps Tiles were super kind and gifted these to me and also allowed me to pick a floor tile to match.
Floor tiles was something I hadn't even thought about. But after looking at their selection of tiles I thought their Matt Hexagon Mosaic ones would work so well. I loved the fact they were small and a different shape to the wall tiles. I thought it would make a nice contrast but compliment each other at the same time.
Once the tiles were put in place, it was time to grout. I went for a white grout on the wall tiles and then for the floor I discovered Topps Tiles did a Rose grout, which I thought would work so well. I loved seeing the tiles come together, my bathroom was starting to take shape.
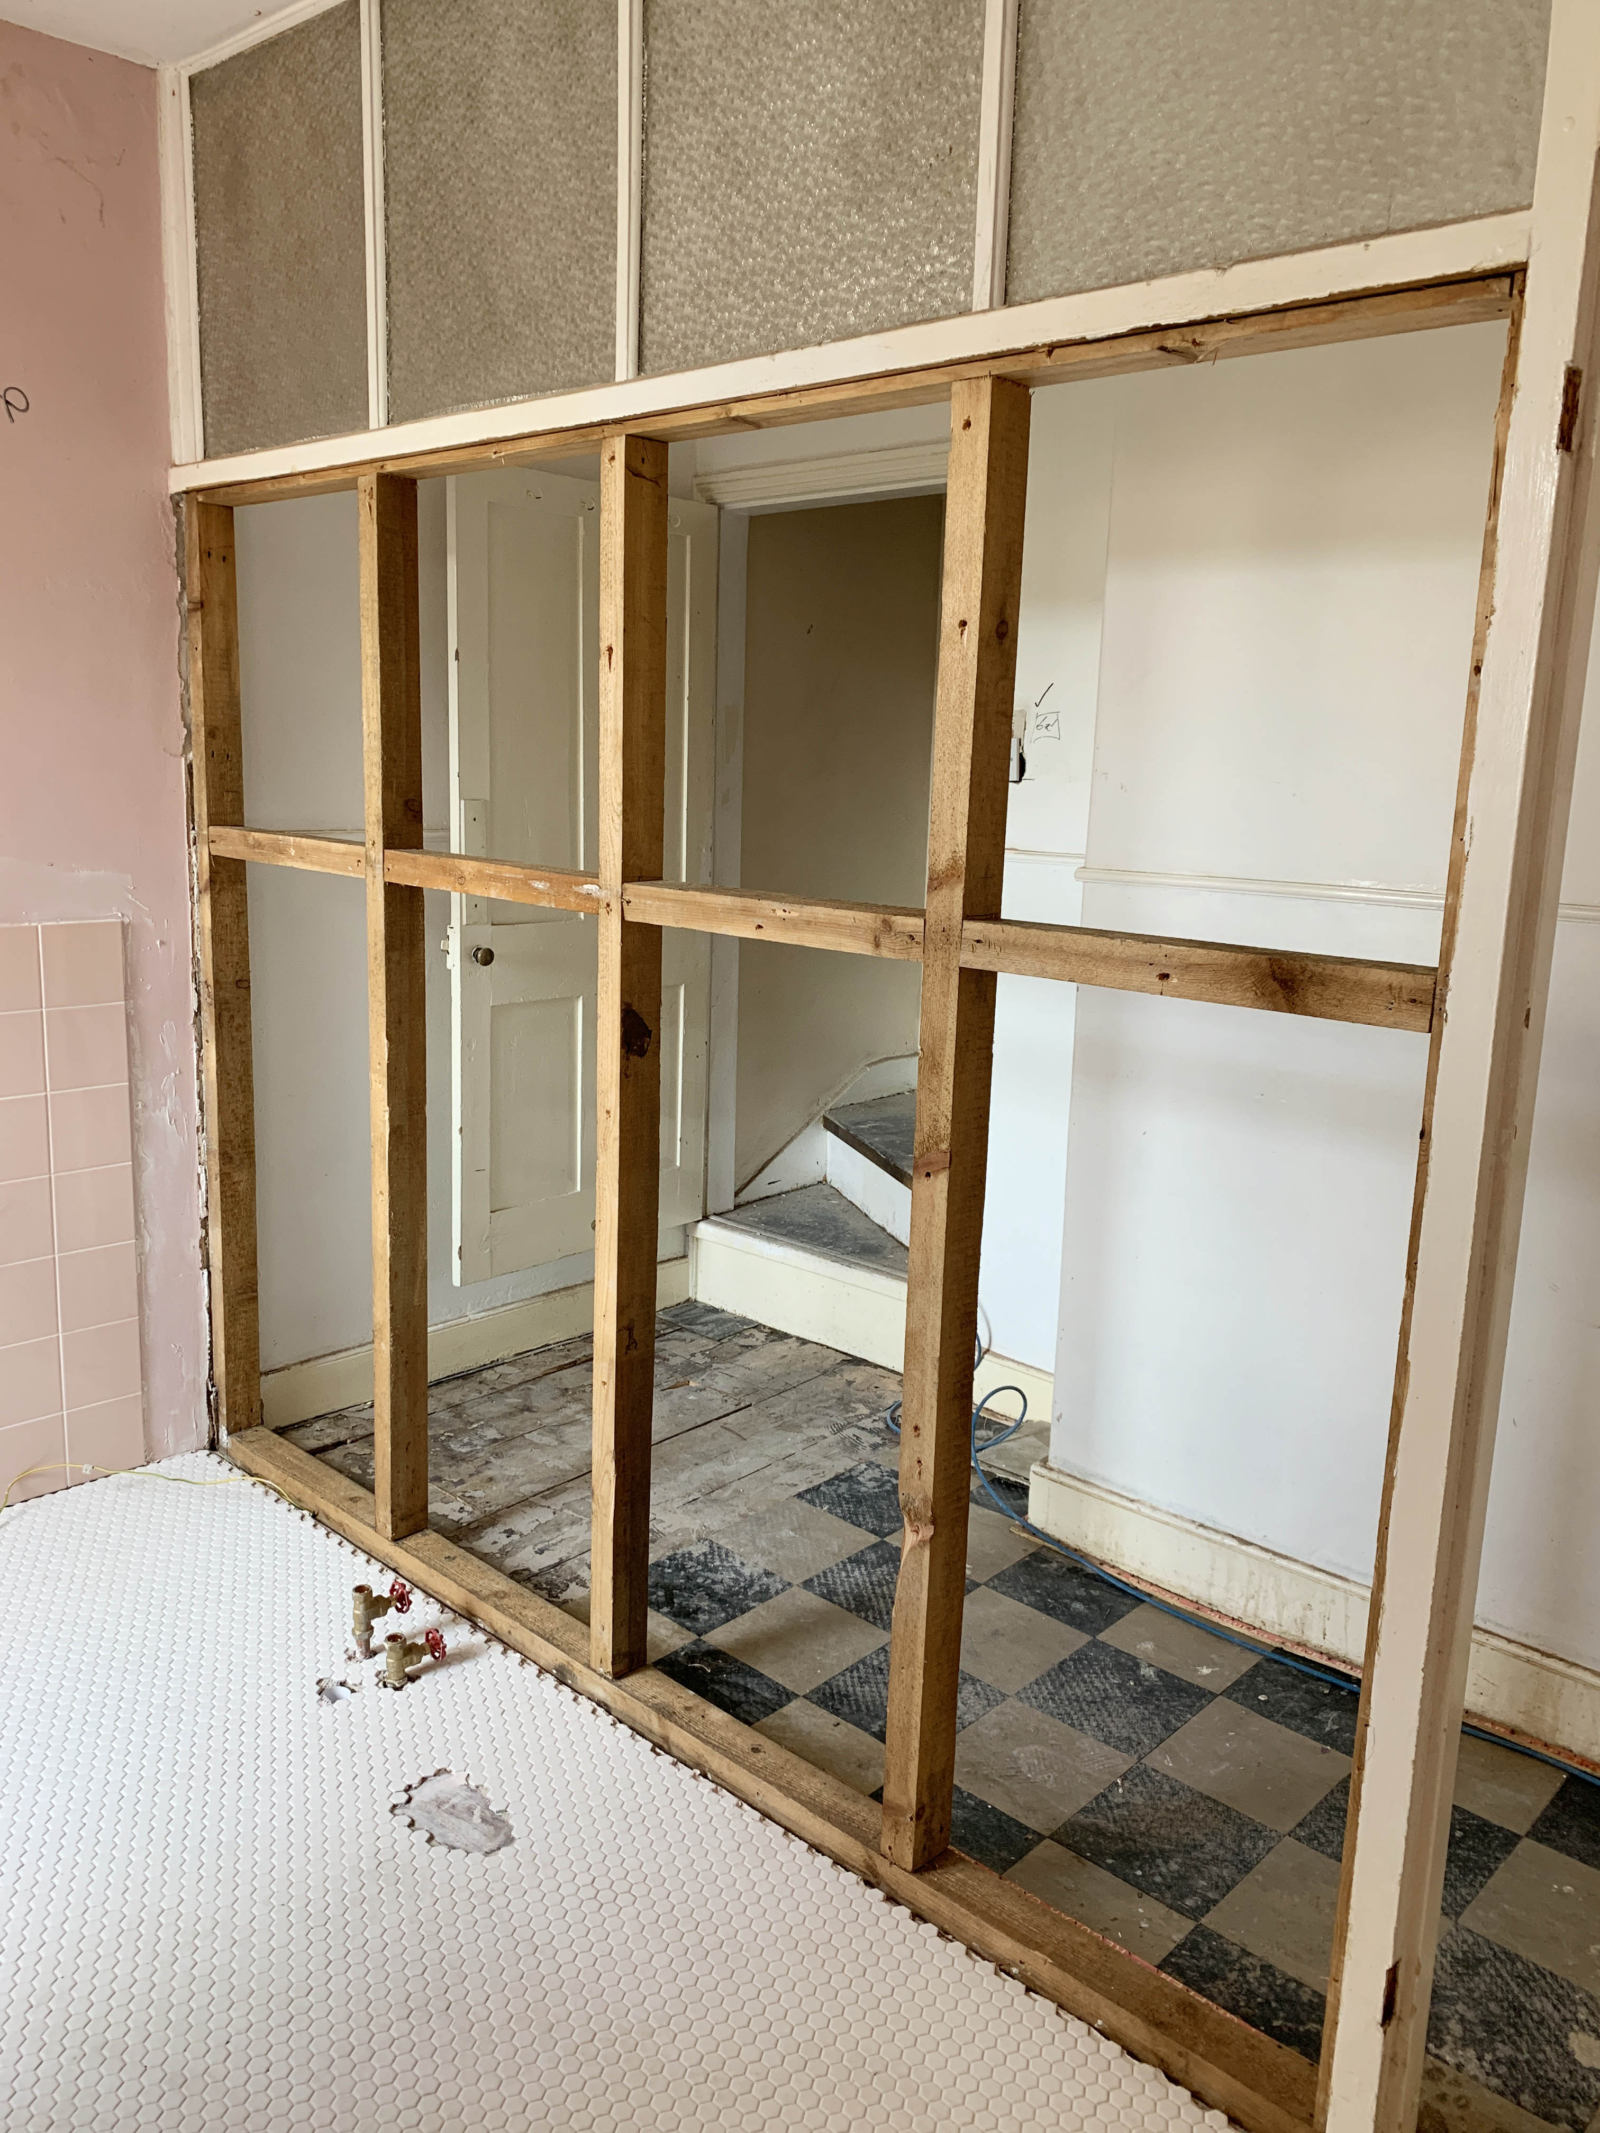
Whilst my tradesmen were tiling they stumbled upon a wall that might have contained asbestos. Not what you want to hear mid renovation.
We called up a local company straight away to come out and test the wall as we didn't want to take the risk and tile over the top in case it was. Well it was asbestos! And it cost us £600 to remove that section of the wall. Crazy I know! Luckily that was the only asbestos found in the house.
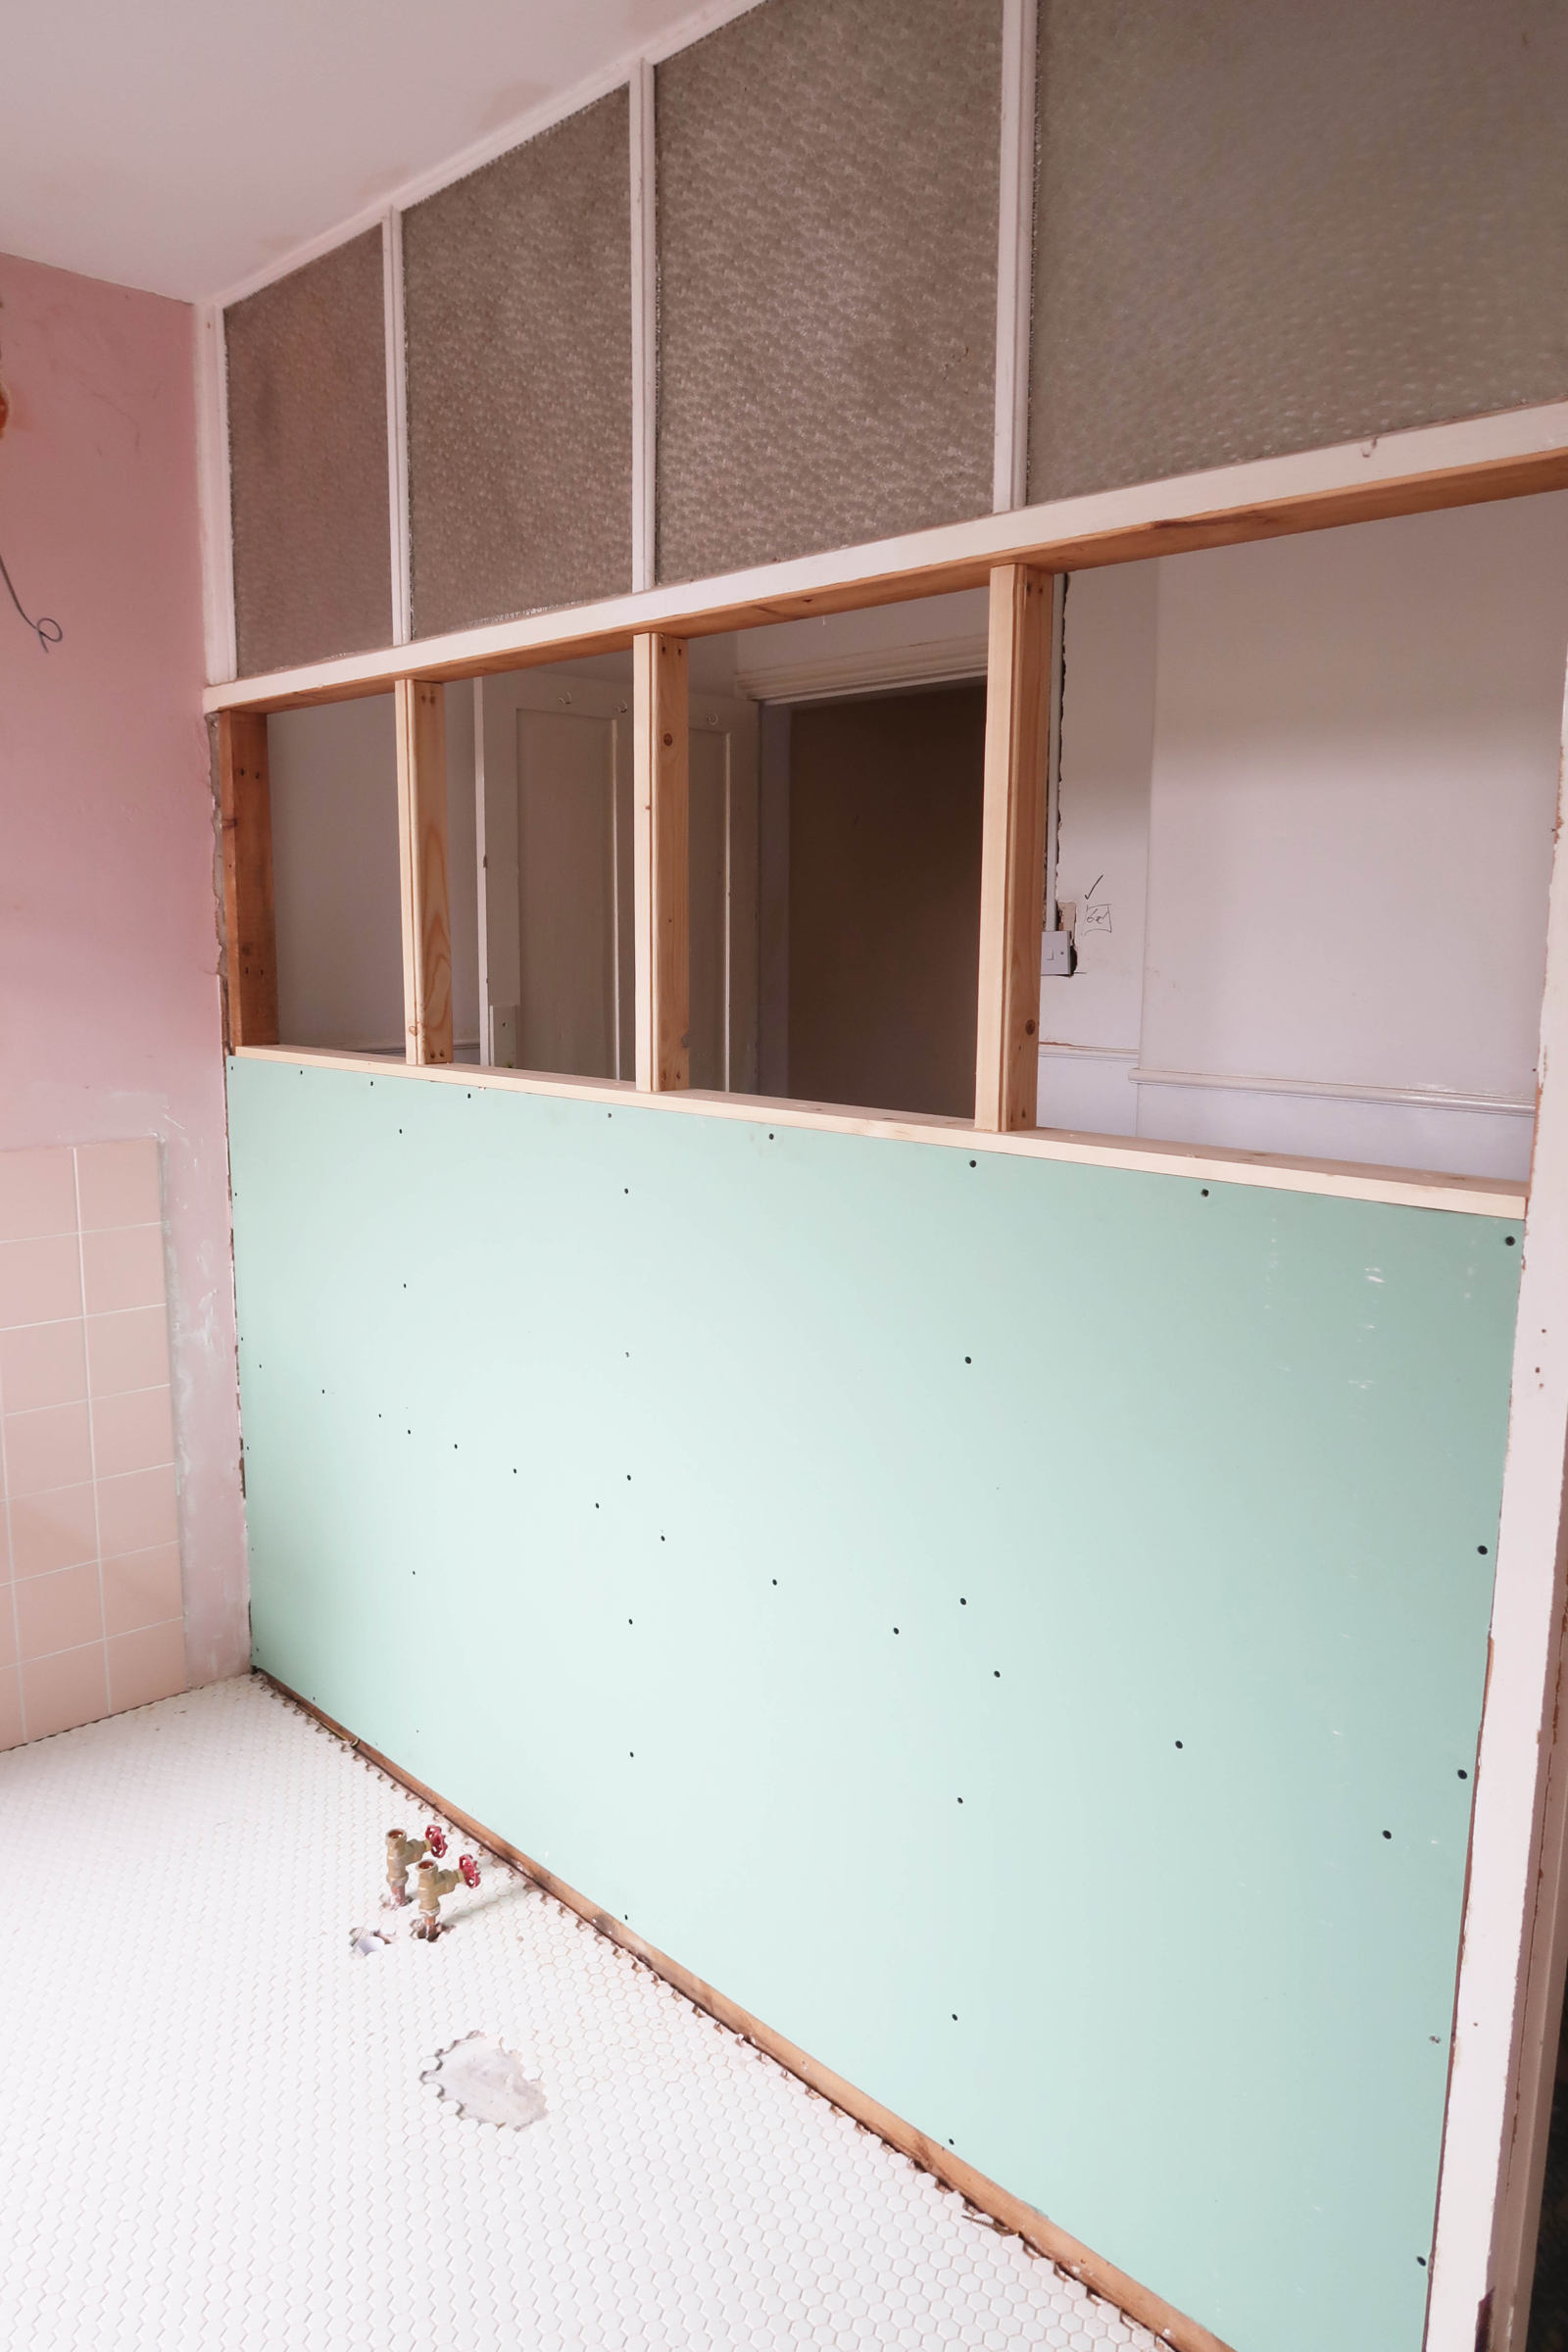
It was such a pain, but finding the asbestos actually helped us out with the design of our bathroom. When the wall was taken out it made the hallway behind so much lighter & airy. I kept thinking, what if we added more panes of glass... And so after a little chat with my carpenter on whether it was possible, we decided to go ahead and add in another row of window panes.
I loved the original glass at the top and really wanted to keep it, but I knew I was never going to find glass to match for the new row. So I decided to get it all removed and we opted for plain glass window panes instead, which we then added pattern window film to for privacy.
Once the tiles were in and grouted, in went the suite. I wanted to keep inline with the period of the property. It was built in the 1800s, so I wanted a bathroom suite that was modern Victorian.
After doing a bit of research and checking out some local bathroom showrooms, I stumbled upon Heritage Bathrooms. They had a gorgeous variety of Victorian styled bathroom suites, which were quite affordable. And they offered vintage gold taps and shower mixers! Oh I don't think I mentioned, silver is banned from the house... Trying to find gold/brass bathroom taps etc was actually SO hard! But thank god I discovered Heritage Bathrooms.
They were kind enough to give me a trade discount when purchasing direct from them which was super helpful for my renovation budget!
We loved their Granley Deco range for the toilet and sink and then for the bath they have a gorgeous roll top called Oban. We got all of the gold taps/shower mixer from Heritage too in their vintage gold colour and it just works so well.
Having a normal pedestal sink really opens up the space compared to the previous owner having a built in sink cupboard.
The only thing Heritage Bathrooms didn't have was vintage gold feet for the Oban bath. However, we got the silver feet anyway and then spray painted them! Super easy to do and the paint took really well.
Picking wallpaper was so hard. Way harder than I thought it would be. I wanted to try and find a wallpaper that had the same/similar pink as the tiles or a palm print/jungle one.
I mocked up many designs on Photoshop to try and see what looked the best. And then after a trip to a local shop to check out the full Cole and Son's wallpaper range, I set my heart on their pink Feather Fan design.
It matched the Matrix Azalea Topps Tile so well and I actually liked the fact it wasn't palm print. We have quite a lot of palm print wallpaper in the rest of the house. So wanted something a little different.


Once the wallpaper was decided, it was onto the last stretch of renovations. I couldn't for the life of me find a gold tile trim I liked. They were all very brassy or yellow gold, which didn't really match the vintage gold of the Heritage Bathroom bits. So instead I got my carpenter to add a skirting board to the room and beading to break up the tiles and wallpaper. This was painted white along with the brown UPVC window. Yup you can paint UPVC - who knew?! I will go into more detail about that in another blog post, but we used Zinsser paint for it.
The large cupboard in the bathroom was also painted and we got some new gold handles for it. I loved the fact we kept this cupboard because it meant we'd have so much storage for toiletries and bathroom bits. And being a beauty blogger, I have tonnes of those!


And that was it! The plumber, tiler and carpenter were done! I got back my electrician to put up my lights and it was onto decorating the space and making it feel homely. This was one of the most exciting parts and the bit I had been most looking forward to.
I stuck with the pink and gold theme for all of the accessories and decor and then a little green with the addition of plants. It's actually taken me a while to find little bits and bobs, which is why I'm only revealing the bathroom now. Sounds silly but I wanted to make sure I had all of the basic bathroom bits before showing you this space.
I've still got lots of ideas of how I want to add to the space and if you want to keep up to date with that, head over and follow me on Instagram @sophiehannahhome.
But for now, scroll down to see the finished pink bathroom of dreams! You will also find links below to all of the decor.


Links for items featured:
- Matrix Azaela tiles by Topps Tiles (gifted)
- Hexagon Matt Mosaic tiles by Topps Tiles (gifted)
- Toilet, Sink & Pedestal, Bath by Heritage Bathrooms (discounted)
- Radiator by Best Heating
- Wicker Basket by Homesense
- Vases by Matalan
- Toilet Brush by Dunelm
- Toothbrush Holder & Dispenser by Matalan
- Toilet Roll Holder by Amazon
- Pampas Grass in pink by Amazon
- Mirror by Amazon
- Wall Lights by Spark & Bell
- Bath Mat by Sage & Clare
- Towel by Christy
- Bath Caddy by Dunelm
- Mirrored Side Tables by Dunelm (gifted)
- Ceiling Light by Mullan Lighting
- Wallpaper by Cole & Sons
- Plants by Canopy Plants
- Window Film by Abode
lots of love
Sophie
x